
help
1
A Singapore Government Agency Website
Back to home
Updated by HELP
How to bulk upload help articles?
Bulk upload lets you multiple articles at once by uploading a CSV file, instead of creating each article one at a time. This is useful when you're onboarding, migrating existing FAQs, or adding a large batch of new content in one go. We recommend doing this if you have more than 20 help articles to add.
With bulk upload, you can:
Upload multiple articles at once from a single CSV file
Automatically create any new topics and subtopics listed in your CSV
Save uploaded articles as drafts, or publish them live immediately
Review and fix errors before anything is actually imported
How to bulk upload articles
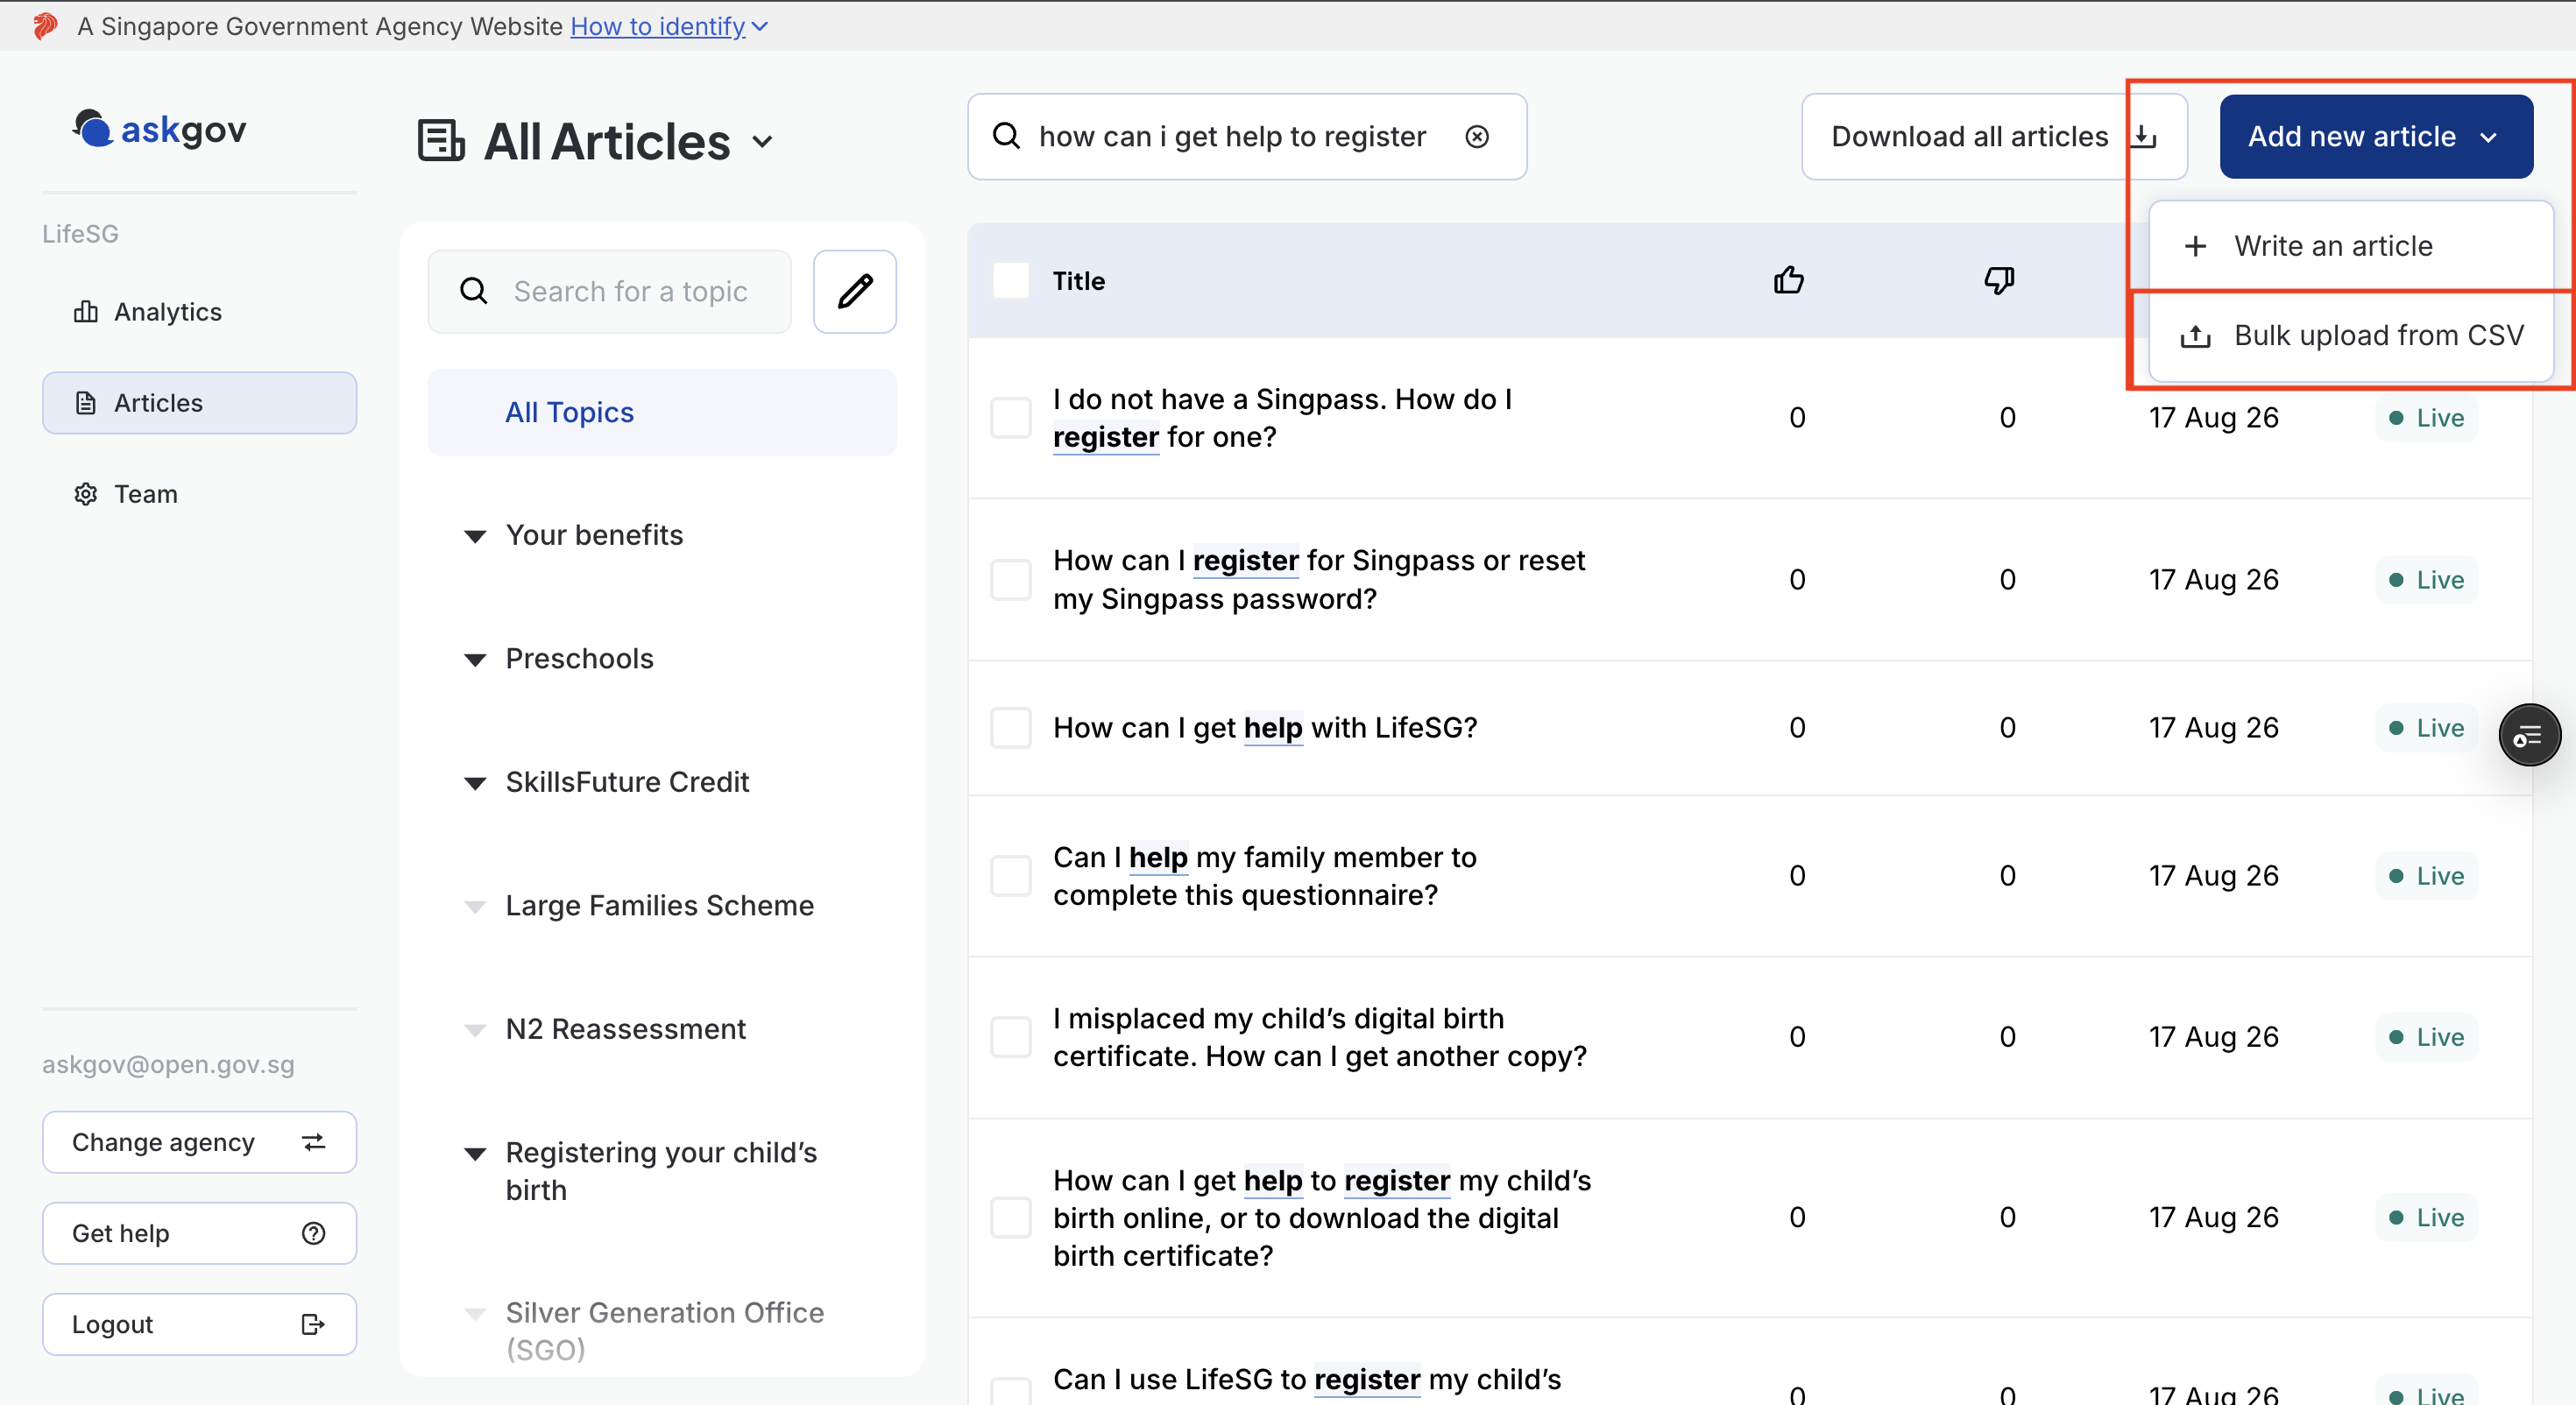
Step 1: Go to your articles dashboard in Admin Studio.
Step 2: Click Bulk upload from CSV.
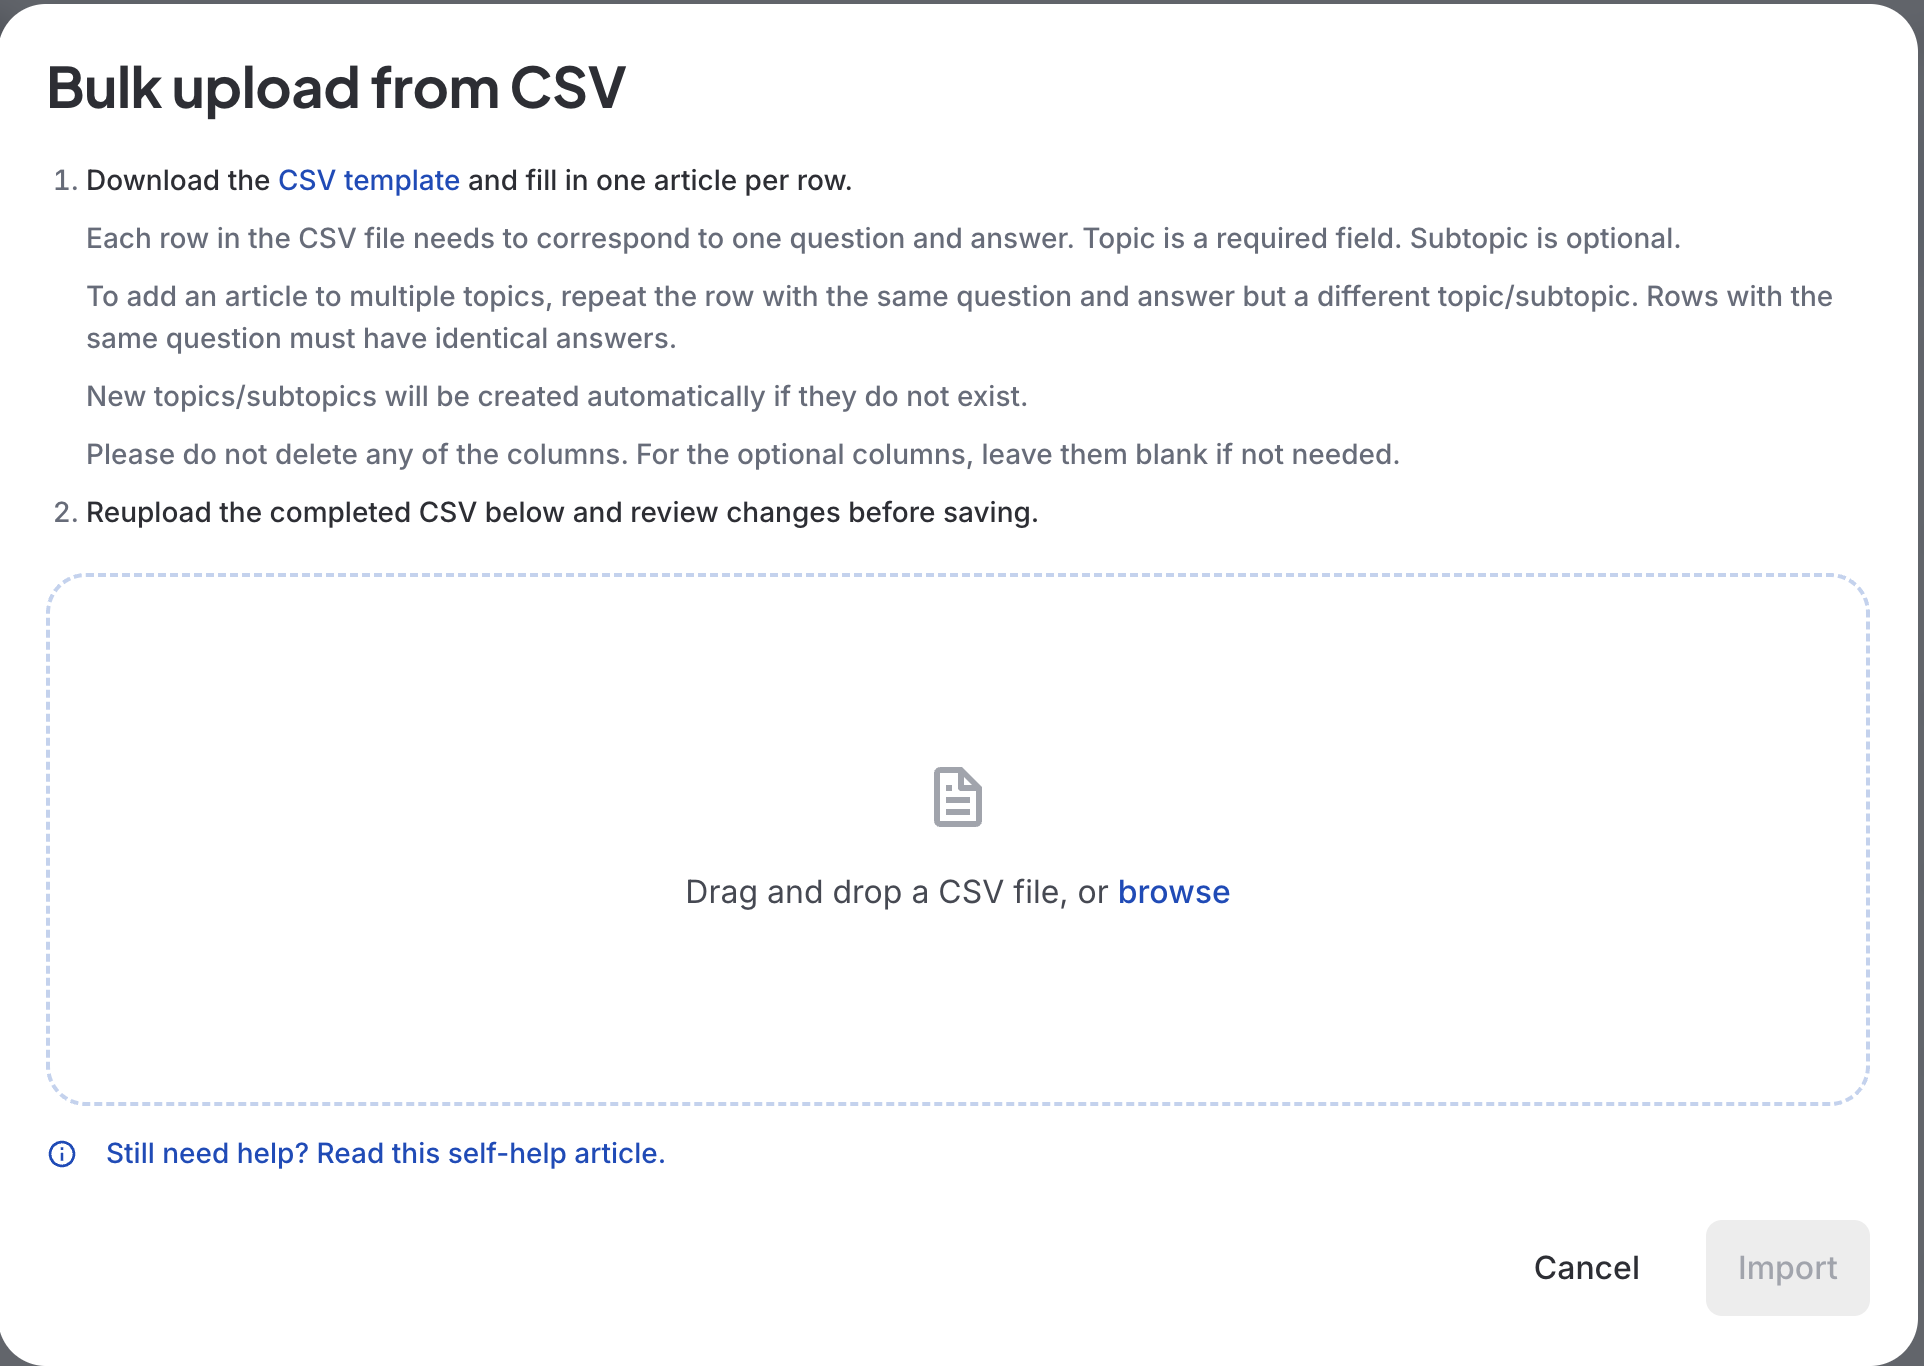
Step 3: Click Download CSV template to get bulk-upload-articles-template.csv. It has four columns:
Column | Required? | Notes |
|---|---|---|
question_title | Yes | Must be unique — duplicate titles (including different casing, e.g. "How to pay" vs "HOW TO PAY") will be rejected |
answer_body | Yes | Supports multi-line text — line breaks are preserved if the cell is quoted |
topic | Yes | |
subtopic | No | Optional |
Step 4: Fill in your articles in the template — one row per article
Formatting your CSV content
Before uploading, check your question_title and answer_body text for characters that aren't supported. Replace them as follows:
Unsupported character | Replace with |
|---|---|
Bullet points (•) | - (a single dash) |
Long dashes (– or —) | - (a single dash) |
Curly/double prime quotation marks (" " and variants) | " (a straight double quote) |
Curly apostrophes / acute accents (' ' and variants) | ' (a straight single quote) |
Images and hyperlinks: the answer_body cell does not support Markdown (e.g. [link](url) or ). Type the HTML tag directly into the cell instead, in plain text:
Hyperlink — to turn "our feedback form" into a link, type the answer_body cell as: Let us know using <a href="https://go.gov.sg/askgovfeedback">our feedback form</a>. This displays as: Let us know using our feedback form.
Image — to embed an image, type the answer_body cell as: <img src="https://file.go.gov.sg/example.png" alt="Example screenshot"> Upload the image to Go.gov.sg first to get the src URL — the same as when adding an image to an article one at a time.
Step 5: Upload your completed CSV by dragging it into the upload area or clicking to browse for the file.
Step 6: Fix any errors shown before continuing. Common errors:
Wrong file type — "Please upload a .csv file"
Empty file — shown if your CSV has no data rows
Missing required fields — lists the row number and which field(s) are missing
Duplicate titles — flagged if two rows share a title (not case-sensitive)
Titles that already exist on your site — shown as "N article(s) already exist"; you'll need to rename or remove these rows before you can import
Step 7: Once your file is error-free, check the review pane. It shows how many topics, subtopics, and articles will be created, and flags any topics/subtopics that are new (don't already exist on your site).
Step 8: Choose whether to import as Draft or Live (Draft is selected by default):
Draft — articles are saved but not visible to the public. They'll appear on your dashboard as drafts.
Live — articles are published immediately to your public help centre and become searchable right away.
Step 9: Click Import. The button will show a loading spinner while the import runs — you won't be able to cancel partway through.
Step 10: Click Done to close the window. Your articles dashboard refreshes automatically — no need to reload the page.
Related questions
Need more help?
Describe your issues to us.